In web development, managing time-based operations effectively is crucial for enhancing user experience and optimizing application performance. JavaScript offers powerful functions such as setTimeout()clearTimeout() to handle these operations. When working within a WordPress environment, integrating these functions can enhance interactivity and responsiveness in themes or plugins. This post provides a detailed explanation of these functions and includes a practical example of how to use them within a WordPress and PHP context.
What is setTimeout()?
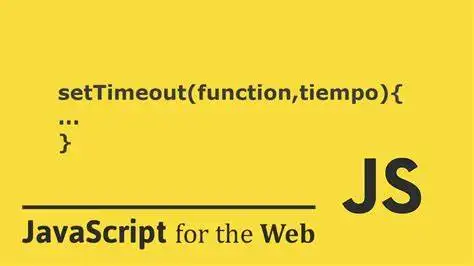
setTimeout() is a standard JavaScript function that allows developers to execute a particular block of code or a specific function after a defined time delay, specified in milliseconds
Syntax:
setTimeout(function, delay);
function: The function that will execute after the delay.delay: The time in milliseconds the function needs to wait before execution.
What is clearTimeout()?
clearTimeout() is used to cancel a timeout previously established by calling setTimeout(). This function becomes especially useful in scenarios where the delayed execution needs to be prevented under certain conditions.
Syntax:
clearTimeout(timeoutID);
timeoutID: The identifier of the timeout you want to cancel. This ID is returned bysetTimeout()
Practical Example of using in a WordPress
Imagine you are developing a WordPress plugin where you need to show a confirmation message on a form submission but want to hide it automatically after a few seconds. Here’s how you could implement this with setTimeout() and clearTimeout(), ensuring it reacts correctly to user actions like quick submissions or navigation.
Step 1: Enqueue the JavaScript File
First, ensure your JavaScript file is added to your WordPress theme or plugin. You can enqueue it in your plugin’s main file or your theme’s functions.php file.
function enqueue_custom_scripts() {
    wp_enqueue_script('custom-js', get_template_directory_uri() . '/js/custom.js', array('jquery'), null, true);
}
add_action('wp_enqueue_scripts', 'enqueue_custom_scripts');
Step 2: Write the JavaScript Code
Create a new file named custom.js in the appropriate directory ( js/custom.js as specified in the enqueue function) and add the following JavaScript code:
document.addEventListener('DOMContentLoaded', function() {
    const submitBtn = document.getElementById('submit-btn');
    const messageBox = document.getElementById('message-box');

    submitBtn.addEventListener('click', function() {
        // Display the message
        messageBox.style.display = 'block';
        messageBox.textContent = 'Form submitted successfully!';

        // Set timeout to hide the message after 1000ms
        var timeout = setTimeout(function() {
            messageBox.style.display = 'none';
        }, 1000);

        // If the button is quickly clicked again before 1000ms,
        // clear the previous timeout and set a new one
        submitBtn.addEventListener('click', function() {
            clearTimeout(timeout);
            timeout = setTimeout(function() {
                messageBox.style.display = 'none';
            }, 1000);
        });
    });
});
In this script:
- We first find the submit button and message box div in our HTML using their IDs.
- On clicking the submit button, the message box is displayed with a confirmation message.
setTimeout()is used to hide the message box after 1000 milliseconds.- If the user clicks the submit button again before the timeout completes,
clearTimeout()is used to cancel the previous timeout and restart the timer.
Conclusion
Using setTimeout() and clearTimeout() provides significant control over time-sensitive JavaScript operations in web applications. Integrating such features in WordPress can greatly enhance the interactivity of your site, making it more dynamic and responsive to user inputs. This example showcases a basic implementation, but these functions can be extended for more complex scenarios with various user interactions within WordPress plugins or themes.